Retrofitting smart film to existing windows is one of the most cost-effective ways to add privacy and smart glass functionality to your space without the expense and disruption of replacing entire glass units. This comprehensive guide covers everything you need to know about applying smart film to existing windows, from preparation to installation and maintenance.
What is Smart Film Retrofit?
Smart film retrofit involves applying a thin, switchable PDLC (Polymer Dispersed Liquid Crystal) film directly to your existing glass surfaces. Unlike smart glass, which requires complete window replacement, smart film can be installed on windows that are already in place, making it an ideal solution for:
- Existing Buildings: Offices, homes, hospitals, hotels with windows already installed
- Budget-Conscious Projects: Lower cost than replacing entire glass units
- Quick Installations: Minimal disruption to daily operations
- Rental Properties: Non-permanent solutions that can be removed if needed
Why Choose Smart Film Retrofit?
Advantages of Retrofitting Smart Film
- No Glass Replacement: Save 40-60% compared to smart glass installation
- Lower Material Costs: Film is significantly cheaper than complete glass units
- Reduced Labor: Faster installation means lower labor costs
- No Structural Changes: No need for window frame modifications
- Quick Installation: Typically 1-3 days for most projects
- Work Continues: Business operations can often continue during installation
- No Demolition: Existing windows remain in place
- Clean Process: Minimal mess and debris
- Custom Sizes: Film can be cut to fit any window size on-site
- Easy Removal: Can be removed if needed (though not recommended)
- Upgrade Path: Can upgrade to smart glass later if desired
- Multiple Applications: Can be applied to various glass types
- Any Glass Type: Works on single, double, or triple pane windows
- Curved Surfaces: Can be applied to curved glass with proper technique
- Various Thicknesses: Compatible with different glass thicknesses
- Existing Frames: Works with all window frame types
Pre-Installation Assessment
Before You Begin: Window Evaluation
- Surface Quality: Glass must be clean, smooth, and free of scratches
- No Damage: Cracks or chips may affect film adhesion
- Age Consideration: Very old glass may need evaluation
- Coating Check: Some low-E coatings may require special preparation
- Single Pane: Standard application, straightforward
- Double/Triple Pane: Works well, no special requirements
- Tempered Glass: Compatible, standard application
- Laminated Glass: Compatible, may require edge sealing
- Sun Exposure: Direct sunlight may require UV-resistant film
- Temperature: Installation temperature should be 15-30°C
- Humidity: Low humidity preferred for better adhesion
- Ventilation: Well-ventilated area for installation
- Power Access: Need electrical outlet near installation area
- Voltage: Standard 220V AC in India
- Wiring: May need conduit for power supply connection
- Control Location: Decide on switch/remote/app control placement
Step-by-Step Installation Guide
Phase 1: Preparation (Day 1)
- Clear the area around windows
- Remove curtains, blinds, or window treatments
- Cover furniture and floors with protective sheets
- Ensure adequate lighting for installation
- Deep Clean: Use glass cleaner and lint-free cloth
- Remove All Residue: No soap, oil, or cleaning product residue
- Dry Completely: Windows must be completely dry
- Final Wipe: Use isopropyl alcohol for final cleaning
- Accurate Dimensions: Measure each window precisely
- Account for Overlap: Add 2-3mm for edge overlap if needed
- Record All Sizes: Document measurements for each window
- Check Square: Ensure windows are square (measure diagonals)
- Cut to Size: Cut film slightly larger than window (5-10mm overlap)
- Handle Carefully: Avoid touching adhesive side
- Store Properly: Keep film flat and protected until application
- Check Orientation: Ensure correct side for application
Phase 2: Application (Day 1-2)
- Mix Solution: Distilled water with 1-2 drops of baby shampoo per liter
- Spray Bottle: Use quality spray bottle for even application
- Temperature: Solution should be at room temperature
- Backup Supply: Have extra solution ready
2. Film Application Process
- Spray application solution generously on glass surface
- Ensure complete coverage, especially edges
- Remove any air bubbles in the solution
- Carefully peel backing paper from film
- Keep adhesive side wet with solution
- Avoid touching adhesive surface
- Align film with window edges
- Leave small margin (2-3mm) from edges
- Ensure straight alignment
- Start from top, work downward
- Use squeegee to remove solution and air bubbles
- Work from center outward
- Apply firm, even pressure
- Use squeegee in overlapping strokes
- Push bubbles toward edges
- Use heat gun for stubborn bubbles (low heat)
- Work systematically across entire surface
- Use sharp utility knife
- Cut along window frame edge
- Remove excess film carefully
- Ensure clean, straight edges
Phase 3: Electrical Installation (Day 2)
- Position Busbars: Apply conductive strips along opposite edges
- Ensure Contact: Busbars must contact film electrodes
- Secure Properly: Use appropriate adhesive
- Check Alignment: Ensure straight, even application
- Mount Controller: Install AC voltage controller in accessible location
- Wire Connection: Connect busbars to controller
- Voltage Check: Verify 60-110V AC output
- Safety: Ensure proper grounding and circuit protection
- Switch Installation: Mount wall switch if using manual control
- Remote Setup: Program remote control if applicable
- App Configuration: Set up mobile app if using smart control
- Test Functionality: Verify switching works correctly
Phase 4: Finalization (Day 2-3)
- Seal Edges: Apply edge sealant to prevent moisture ingress
- Clean Application: Ensure neat, professional appearance
- Allow Curing: Let sealant cure per manufacturer instructions
- Final Inspection: Check all edges are properly sealed
- Function Test: Test clear/opaque switching multiple times
- Response Time: Verify switching speed (<100ms)
- Uniformity Check: Ensure even opacity across entire surface
- Power Consumption: Verify power usage is within specifications
- Remove Protection: Remove all protective coverings
- Clean Windows: Final cleaning of installed film
- Restore Area: Return furniture and window treatments
- Documentation: Provide installation documentation
Cost Analysis: Smart Film Retrofit
Cost Breakdown
- Smart Film: ₹800-1,500 per square foot
- Power Supply: ₹3,000-8,000 per controller
- Busbars: ₹500-1,500 per window
- Control System: ₹2,000-5,000 (switch/remote/app)
- Edge Sealant: ₹500-1,000 per window
- Professional Installation: ₹200-400 per square foot
- Electrical Work: ₹1,000-3,000 per window
- Project Management: 10-15% of total cost
- Small Project (5 windows, 50 sq ft): ₹60,000-90,000
- Medium Project (20 windows, 200 sq ft): ₹240,000-360,000
- Large Project (50+ windows, 500+ sq ft): ₹600,000-900,000
Cost Comparison
- Smart Film: ₹1,000-1,900 per sq ft (total)
- Smart Glass: ₹2,500-5,000 per sq ft (total)
- Savings: 40-60% with smart film retrofit
Common Challenges and Solutions
Challenge 1: Air Bubbles
- Use proper application solution
- Work systematically with squeegee
- Use heat gun for stubborn bubbles (low heat, careful)
- Small bubbles may disappear over time
Challenge 2: Edge Lifting
- Ensure proper edge sealing
- Use quality edge sealant
- Check for moisture ingress
- May need professional re-sealing
Challenge 3: Electrical Issues
- Check busbar connections
- Verify power supply output
- Test voltage at film edges
- Ensure proper grounding
Challenge 4: Adhesion Problems
- Ensure glass is completely clean
- Check glass surface quality
- Verify proper application technique
- May need surface preparation
Maintenance and Care
Daily Maintenance
- Standard Cleaning: Use glass cleaner and soft cloth
- Avoid Abrasives: No harsh chemicals or abrasive materials
- Gentle Wiping: Use soft, lint-free cloths
- Regular Inspection: Check for any issues
Periodic Maintenance
- Monthly: Check electrical connections
- Quarterly: Inspect edges and sealant
- Annually: Professional inspection recommended
- As Needed: Address any issues promptly
Long-Term Care
- Film Replacement: May need replacement after 8-12 years
- Power Supply: Typically lasts 10+ years
- Control Systems: Update software/firmware as needed
- Professional Service: Annual professional maintenance recommended
Best Practices for Success
1. Professional Installation
- Hire Experts: Use certified installers
- Experience Matters: Choose installers with retrofit experience
- Warranty: Ensure installation warranty
- References: Check previous project references
2. Quality Materials
- Premium Film: Invest in quality film for longevity
- Proper Components: Use recommended power supplies and controls
- Quality Sealants: Use appropriate edge sealants
- Warranty Coverage: Ensure comprehensive warranty
3. Proper Planning
- Site Assessment: Thorough pre-installation evaluation
- Timeline: Allow adequate time for installation
- Access: Ensure installer access to all windows
- Coordination: Coordinate with other trades if needed
4. Post-Installation
- Documentation: Keep all installation documents
- Training: Train users on operation and maintenance
- Support: Maintain contact with installer for support
- Warranty: Understand warranty terms and coverage
Applications: Where Smart Film Retrofit Works Best
Residential Applications
- Home Windows: Bedroom, bathroom, living area privacy
- Balconies: Privacy while maintaining views
- Skylights: Control light and privacy
- Partitions: Room dividers and privacy screens
Commercial Applications
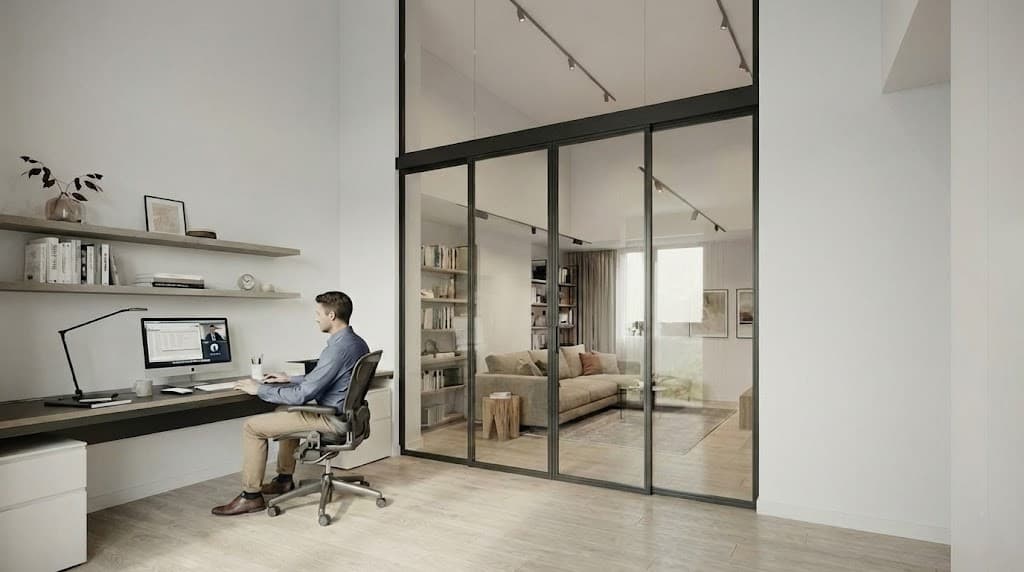
- Office Partitions: Conference rooms, meeting spaces
- Reception Areas: Professional appearance with privacy
- Retail Displays: Dynamic product showcases
- Restaurants: Flexible dining space privacy
Healthcare Applications
- Hospital Rooms: Patient privacy
- Clinics: Consultation room privacy
- Medical Facilities: Modern, hygienic solutions
Hospitality Applications
- Hotels: Room dividers, bathroom privacy
- Spas: Treatment room privacy
- Restaurants: Flexible dining spaces
When NOT to Retrofit Smart Film
Situations Where Replacement May Be Better
- Cracks or significant damage
- Structural integrity concerns
- May need glass replacement anyway
- Windows near end of life
- May need replacement soon
- Cost-benefit analysis needed
- Specific glass specifications needed
- Structural glazing requirements
- Premium finish requirements
- Major renovation project
- All windows being replaced
- Opportunity for smart glass integration
Conclusion
Smart film retrofit is an excellent solution for adding smart glass functionality to existing windows without the cost and disruption of complete replacement. With proper planning, professional installation, and quality materials, smart film retrofit can provide years of reliable service while significantly reducing costs compared to smart glass replacement.
Whether you're upgrading an office building, adding privacy to a home, or modernizing a commercial space, smart film retrofit offers a practical, cost-effective solution that delivers the benefits of smart glass technology at a fraction of the cost.
---
Ready to retrofit smart film to your existing windows? Contact Shreesha Tech today for expert consultation, professional installation, and comprehensive support. Our experienced team can assess your windows, provide detailed cost estimates, and ensure a successful retrofit installation.